How to Make Sourdough Bread (Beginner-Friendly Recipe)
Affiliate disclosure: This article contains affiliate links. If you buy through them, we may earn a small commission at no extra cost to you. As an Amazon Associate I earn from qualifying purchases. Links go to Amazon search results for the product types we mention, not to specific products we have tested.
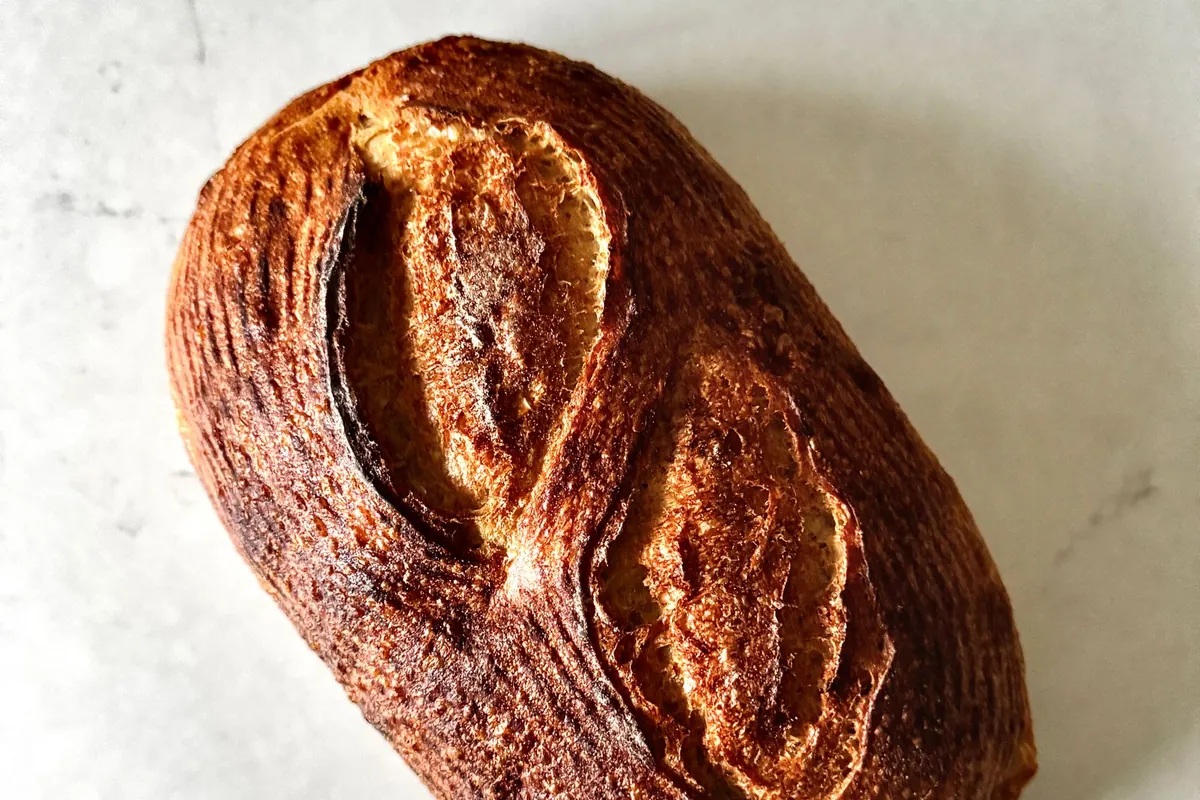
A crackly crust, a chewy, open crumb and that gentle tang: sourdough is worth the wait. This guide shows you how to make sourdough bread from start to finish with a beginner-friendly loaf. It uses a moderate hydration that's easier to handle than very wet doughs, simple stretch and folds instead of kneading, an overnight rest in the fridge and a Dutch oven for a bakery-style crust.
The method follows a standard home sourdough process. Timing depends heavily on your starter and kitchen temperature, so this guide teaches you what to look for at each stage, not just how long to wait.
Before you start: is your starter ready?
Your loaf can only rise as well as your starter. Before baking, make sure it:
- Doubles in volume within about 4 to 8 hours of feeding, consistently, for several days
- Is bubbly throughout, with a domed top at its peak
- Smells pleasantly tangy, not like nail-polish remover
Use your starter at or near its peak, a few hours after feeding when it's risen and bubbly. If you don't have a starter yet, follow our guide on how to make sourdough starter from scratch; it takes about one to two weeks.
Ingredients
Makes 1 loaf:
- 450 g bread flour
- 50 g whole wheat flour
- 350 g lukewarm water (about 80°F / 27°C), divided (325 g + 25 g)
- 100 g active sourdough starter (100% hydration, at its peak)
- 10 g fine sea salt
- Rice flour, for dusting the basket
Flour, water, salt and starter
- Bread flour: its higher protein content gives a stronger dough and a chewier crumb. A small portion of whole wheat flour adds flavor and helps fermentation.
- Water: lukewarm, around 80°F (27°C), helps fermentation get going.
- Fine sea salt: for flavor and to strengthen the gluten. Don't skip it.
- Active sourdough starter: at 100% hydration (fed with equal weights of flour and water).
Baker's percentages
Bakers describe bread recipes as percentages of the total flour weight, which makes it easy to scale and compare. Flour is always 100%.
| Ingredient | Weight | Baker's percentage |
|---|---|---|
| Bread flour | 450 g | 90% |
| Whole wheat flour | 50 g | 10% |
| Water | 350 g | 70% (hydration) |
| Active starter | 100 g | 20% |
| Salt | 10 g | 2% |
Hydration is the water weight as a percentage of flour. 70% is a moderate hydration that's manageable for beginners. As you gain confidence, you can increase it gradually for a more open crumb, but the dough becomes stickier and harder to shape.
Equipment
- Kitchen scale (essential; sourdough is measured in grams)
- Large mixing bowl or clear container (a clear container makes it easier to see the rise)
- Bench scraper
- Proofing basket (banneton) or a bowl lined with a well-floured kitchen towel
- Dutch oven with a lid, about 5 to 7 quarts, or see the alternatives below
- Lame or very sharp knife for scoring
- Parchment paper
- Instant-read thermometer (helpful)
You don't need a stand mixer; stretch and folds do the work.
Shop banneton proofing baskets on Amazon
Shop Dutch ovens for bread on Amazon
Step-by-step instructions
Mix and autolyse
- Mix flour and water. In a large bowl, mix 450 g bread flour, 50 g whole wheat flour and 325 g of the lukewarm water until no dry flour remains. Reserve the remaining 25 g water. Cover and rest for 30 to 60 minutes. This rest, called an autolyse, lets the flour hydrate and gluten begin to form, making the dough smoother and easier to work.
- Add starter. Add 100 g active starter. Dimple it into the dough with wet fingers and squeeze and fold until combined.
- Add salt. Sprinkle 10 g salt over the dough with the reserved 25 g water. Squeeze and pinch the dough until the salt dissolves and the water is absorbed, 2 to 3 minutes. The dough will feel shaggy at first, then smoother.
- Cover and note the time. Bulk fermentation has started.
Stretch and folds
Stretch and folds build strength in the dough without kneading.
- About 30 minutes after adding salt, wet your hand, grab one side of the dough, stretch it up until you feel resistance and fold it over to the opposite side.
- Rotate the bowl a quarter turn and repeat, for four folds in total (one set).
- Cover and rest 30 minutes.
- Do 3 to 4 sets in total, 30 minutes apart, over the first 1½ to 2 hours.
You'll feel the dough change from slack and sticky to smoother, stronger and more elastic with each set.
Bulk ferment
After the last set of folds, cover the dough and let it continue to rise undisturbed. Total bulk fermentation (counting from when you added the starter) often takes about 4 to 6 hours at around 75 to 78°F (24 to 26°C), longer in a cooler kitchen, shorter in a warmer one.
Bulk fermentation is done when:
- The dough has grown by roughly 50 to 75% (not necessarily doubled)
- The surface is domed and smooth, with some bubbles on top and along the sides
- It jiggles when you shake the bowl
- It feels airy and lighter
Judging bulk is the most important skill in sourdough. Under-fermented dough gives a dense, tight loaf; over-fermented dough becomes slack and spreads.
Shape
- Pre-shape: turn the dough onto an unfloured counter. Using a bench scraper, gently fold it into a loose round, tucking the edges under. Rest uncovered for 20 to 30 minutes.
- Prepare your basket: dust the banneton or towel-lined bowl generously with flour (rice flour sticks least).
- Final shape: lightly flour the top of the round and flip it over. Fold the bottom third up, the sides in, and the top down, then roll it toward you into a tight ball or oval (for a round boule or oval batard). Drag it gently across the counter to tighten the surface.
- Place the dough seam side up in the basket.
Cold proof overnight
Cover the basket (a plastic bag or shower cap works) and refrigerate for about 8 to 16 hours. The cold proof:
- Develops more flavor
- Makes the dough firmer and easier to score
- Gives you a flexible schedule
Score and bake in a Dutch oven
- Place the Dutch oven (with lid) in the oven and heat to 475°F (245°C) for 45 to 60 minutes.
- Take the dough straight from the fridge. Turn it out onto a piece of parchment, seam side down.
- Score the top with one confident cut about ½ inch (1 cm) deep at a shallow angle, using a lame or sharp knife. A single long slash along a batard or a cross or square on a boule both work.
- Carefully lower the dough on the parchment into the hot Dutch oven. Cover.
- Bake covered for 20 minutes. The lid traps steam, which keeps the crust soft long enough for the loaf to expand.
- Remove the lid, lower the temperature to 450°F (230°C) and bake another 20 to 25 minutes, until the crust is deep golden brown.
- The loaf is done when it sounds hollow when tapped on the bottom; many bakers look for an internal temperature of about 205 to 210°F (96 to 99°C).
- Cool on a rack for at least 1 to 2 hours before slicing. The inside is still setting; cutting early makes it gummy.
No Dutch oven? Bake on a preheated baking stone or heavy baking sheet and create steam by placing a metal pan on the lower rack and pouring a cup of hot water into it as you load the bread. Use oven mitts and stand back from the steam. Or cover the loaf with a large overturned oven-safe pot or roasting pan for the first 20 minutes.
Sample baking schedules
Weekday schedule
| When | Step |
|---|---|
| Tuesday 9:00 PM | Feed starter (use a 1:5:5 ratio so it peaks in the morning) |
| Wednesday 7:00 AM | Mix flour and water (autolyse) |
| 7:45 AM | Add starter and salt |
| 8:15 AM | First set of stretch and folds (then leave for work in a cool spot, or do sets until you leave) |
| Evening, about 5:00 to 6:00 PM | Check bulk; pre-shape and shape when ready |
| 6:30 PM | Refrigerate for cold proof |
| Thursday 7:00 AM | Preheat and bake |
A 9- to 10-hour bulk only works if you slow fermentation down: use 50 g starter instead of 100 g and keep the dough somewhere cool, around 65 to 68°F (18 to 20°C). In a warm kitchen it may still finish before you're home, so check it at lunchtime if you can.
Weekend schedule
| When | Step |
|---|---|
| Friday 10:00 PM | Feed starter (1:5:5 so it peaks in the morning) |
| Saturday 8:00 AM | Autolyse |
| 9:00 AM | Add starter and salt |
| 9:30 AM to 11:00 AM | 4 sets of stretch and folds |
| About 1:00 to 3:00 PM | Bulk ends; pre-shape, shape |
| 3:30 PM | Refrigerate |
| Sunday 8:00 AM | Bake; fresh bread for brunch |
How to make sourdough more sour
- Lengthen the cold proof (up to about 24 hours), which develops more acidity.
- Use more whole-grain flour, especially rye, in the dough and in starter feedings.
- Use your starter slightly past its peak, when it's more acidic.
- Keep a stiffer starter (less water), which tends to favor sour acetic flavors.
- Ferment a little cooler for longer.
For a milder loaf, do the opposite: use a young starter just as it peaks, fewer whole grains and a shorter cold proof.
Troubleshooting
Dense crumb
- Starter wasn't active enough. Make sure it doubles reliably before baking.
- Bulk fermentation was too short. Let the dough rise 50 to 75% and feel airy.
- Not enough strength. Do all your stretch and folds.
- Too much flour on the counter while shaping can create dense streaks.
Flat loaf
- Over-fermented dough that became slack. Shorten bulk or use a cooler spot.
- Weak shaping. Build surface tension during final shaping.
- Hydration too high for your flour or skill level. Try 65 to 68% water.
- Oven or Dutch oven not fully preheated.
Gummy inside
- Cut too soon. Cool for at least 1 to 2 hours.
- Under-baked. Bake until deep brown and about 205 to 210°F inside.
- Under-fermented dough can also be gummy and dense.
What to bake next
Add active starter or discard to our homemade pizza dough for flavor and chew, or for a holiday bake try our Christmas bread recipe, a braided sweet yeast bread.
Make-ahead, storage and freezing
Counter
- Store cooled sourdough cut side down on a board or in a paper or cloth bread bag for 2 to 3 days. Its natural acidity helps it keep longer than many yeasted breads.
- Avoid the fridge, which stales bread faster.
- Refresh a day-old loaf in a hot oven for 5 to 10 minutes.
Freezing slices
- Slice the cooled loaf, wrap tightly or place in a freezer bag with the air pressed out, and freeze for up to about 3 months.
- Toast slices straight from frozen.
- For a whole loaf, wrap well and thaw at room temperature, then refresh in a hot oven.
Shop bread storage bags on Amazon
Frequently asked questions
How long does it take to make sourdough bread?
Plan on about 24 hours from start to finish, though only about an hour is hands-on. That includes feeding your starter, 4 to 6 hours of bulk fermentation, shaping, an 8- to 16-hour cold proof in the fridge, about 45 minutes of baking and cooling. The long timeline builds flavor.
Can I make sourdough without a Dutch oven?
Yes. Bake on a preheated baking stone or heavy sheet pan and add steam by pouring hot water into a metal pan on the lower rack as you load the loaf. You can also cover the loaf with an overturned oven-safe pot for the first 20 minutes to trap steam.
Why is my sourdough dense?
Dense sourdough usually means the starter wasn't active enough or the dough was under-fermented. Make sure your starter doubles reliably, let bulk fermentation go until the dough has grown about 50 to 75% and feels airy, and complete all your stretch and folds to build strength.
Recipe notes
- Watch the dough, not the clock: temperature changes timing a lot.
- If the dough is too sticky to handle, reduce the water to 325 g total next time.
- Contains wheat.
About the author: This recipe was written by the Warm Oven Bakes Editorial Team using established home sourdough technique and standard baker's percentages. Use the visual cues for each stage alongside the times.